Admittedly, we got caught off guard when a foreign hackerspace member stopped by to visit and asked for a stamp on his Hackerspace Passport. Well, we didn’t have one. A few days later we did. Here’s how we made a Hackerspace Passport Stamp on our CNC Engraver:
Design:
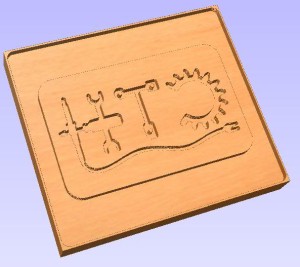
We already had our logo made in Inkscape so we converted it to dxf format and loaded into Draft Sight, a free and awesome 2D CAD program from Dassault Systemes. The coolest part of this fully function software may be that it runs on linux. But anyways, the design was modified to meet the size requirements specified on the Noisebridge site. Some of the geometry had to be changed to allow our smallest endmill (1/32″) to mill out the pockets required. REMEMBER to mirror your CAD drawing at this time so that your stamp doesn’t stamp a mirror image of your logo! We didn’t make this mistake at first, of course, because that would have been really dumb and completely obvious after the fact.
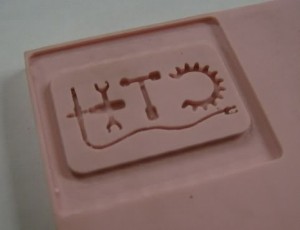
CAM Simulation showing what the stamp should look like.
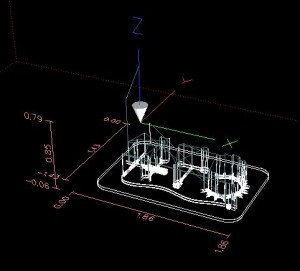
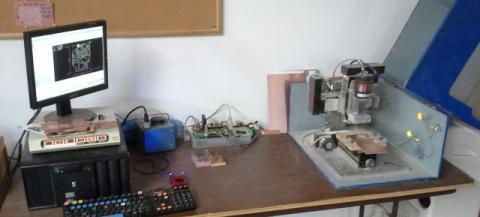
EMC2 is ready to rock and roll!
Cutting:
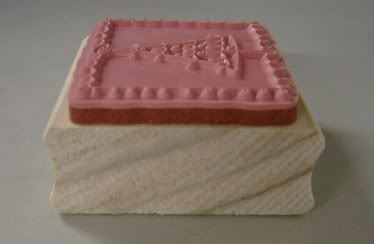
You may not have know this but craft stores have material for making stamps. We purchased a piece of stamp rubber for $5 that is large enough to do 6 or so passport-sized stamps. Incase you were wondering, yes we paid extra for the pink one.
The mill is 1/32″ (0.03125″) in diameter, which sounds small but it is still pretty big in relation to the the size of the geometry that was being cut. After the logo was cut out using the 1/32″ bit, a 1/8″ bit was used to remove the material around the perimeter of the stamp. We cut to a total depth of 0.060″, using 2 passes at 6 ipm. The dremel speed is variable and is at about half. The total cut time was 20 – 25 minutes or so.
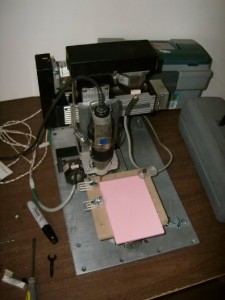
Here’s our machine in all its glory.
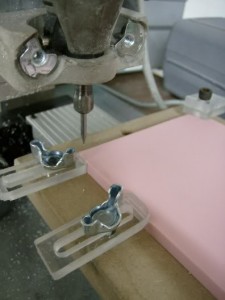
A close up of the 1/32″ bit. We made those hold downs on the engraver too!
.
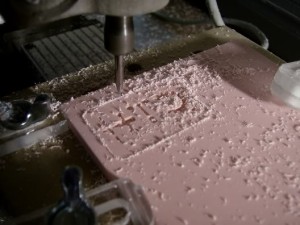
The 1/32 end mill cuts pretty good.
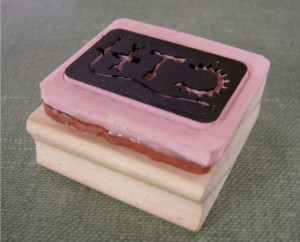
Cutting: Complete
While at the craft store acquiring stamp rubber, I noticed that Christmas stamps were on super-clearance. At 30 cents each I had to grab a bunch to use just the handles. Notice that there is a layer of soft foam between the rubber and the wood handle. It was possible to peel away the rubber and leave the foam attached to the wood. Next up was to glue our stamp to the clearance stamp handle! We are now in passport-stamping business.

Christmas Tree stamp.
Done Deal!
If there are any hackerspaces out there that lack the capability to make their own passport stamps, contact us and we will cut them out for you at material/shipping cost, or stop by with your own material and leave with a stamp.


