Here’s our story about our CNC Mini Mill / Engraver that was put together by several of the CT Hackerspace members. We use this mostly to cut PCB Boards, but we’ve used to a little to carve stamps (like our Hackerspace Passport Stamp) and to cut some plexiglass. I’ve been meaning to write this up for a very long time but the Hack-A-Day Henchmen article got me to get off my butt.
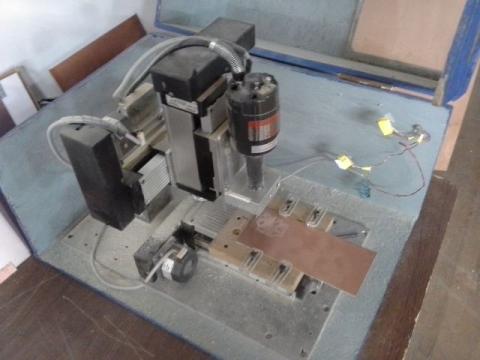
Jeff’s brother deals with used machinery for a living. Jeff was able to acquire three separate axis assemblies that were pulled out of a piece of unknown equipment. They all have THK linear bearings, ball screws and PacSci NEMA 23 stepper motors already installed. The axes used for the X and Y directions have 4 inches of travel and the one used for the Z axis has 2 inches of travel.
First we had to mount the Y axis to a piece of aluminum plate we had kicking around. This was a sturdy flat base. We then had to make an adapter plate to connect the X and Z axis together. There is a funky 90 degree steal bracket that we found in the shop that we used to support the X and Z axis assembly. Making the adapter pieces and getting everything assembled took one entire night. I personally did not sleep this night, I worked on this till 5am, went home, ate breakfast, showered and went straight to work. It was a ruff day at work, for sure.
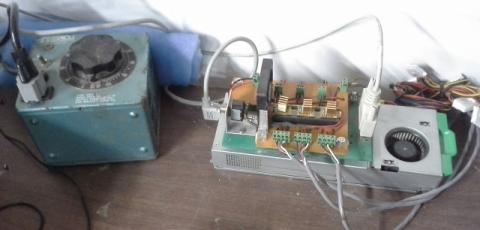
Jeff pulled a parallel breakout board out of a piece of non-working machinery. He then bread boarded out an adapter for some Pololu stepper motor drivers. Here’s a page regarding the driver board. Jeff used a Dell PC power supply to power the motors. Jeff mounted all these parts in a tidy package. Check out the Variac set up to control the speed of the spindle.
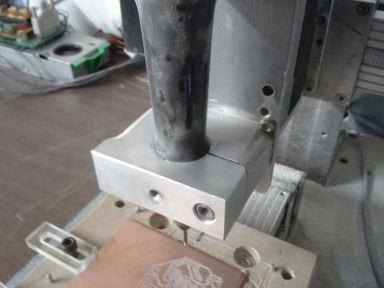
The first spindle we used was a dremel. We made a mount that utilized the threaded portion of the dremel to mount. This wasn’t the most sturdy method. Matt came up with a real spindle and made the aluminum mount that you see in the photos. This setup is rock solid.
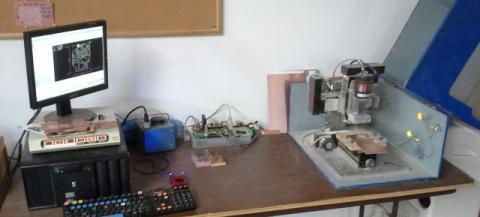
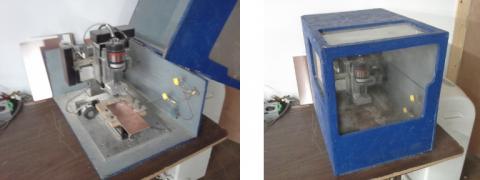
The new spindle was louder than the dremel, loud enough to annoy the other members that were working on other projects. We had plywood, plexiglass and hinges in the materials area so we made a sound/dust enclosure. I got the blue paint from home depot for free, it was a small sample size that someone didn’t like after it was mixed up. Zero dollar enclosure!
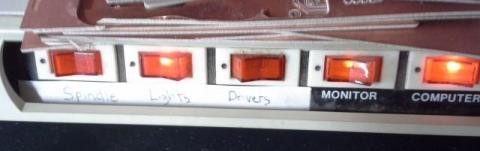
Under the monitor is a 1980’s PC power switch. We use it to distribute the power to the CNC Machine parts. We have switches for the computer and monitor, of course. We also are able to turn on the motor drivers, spindle and interior cabinet lights from the computer with the enclosure closed.
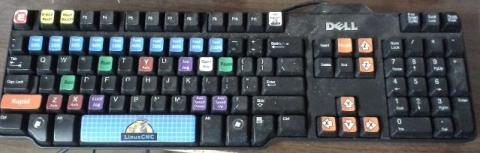
Our keyboard was modified to show the LinuxCNC shortcuts, this was on Hack-A-Day in 2012.
The interior cabinet lights are the LED assemblies from those free Harbor Freight flashlights hooked up to a wall wart. The OS is LinuxCNC. I can’t say enough good about this software. We got the PC from a vendor at the MIT Flea Market.
Although some of the components are valuable, the overall cost to the group was extremely low for the group. Pololu Drivers: $30 , PC: $10
Here’s a quick video we took right when we got this working, it still has the dremel mounted.