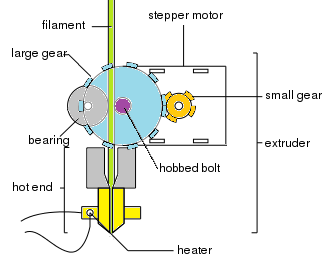
 With the Wade-style RepRap 3D Printer extruders, the part that actually drives the filament is a ‘hobbed bolt’. A hobbed bolt has a little toothed-groove around its circumference that grips the filament and drives it into the hot-end as the bolt is turned. There’s a few ways to make a hobbed bolt. We’ll show you one way here that utilizes a Tap and Milling Machine.
For a typical Wade-style extruder, an 8mm bolt is used. Since we want to cut the toothed groove completely around the bolt we need that bolt to rotate. What better way to do that than to mount it in a pair of bearings. Regular skate bearings (608zz) have 8mm inner diameters and are actually what are used to support the bolt in the Wade extruder. I designed up a quick 3D-printed bracket to hold a pair of bearings and provide some features for easy clamping in the Milling Machine’s vise.
Here’s the fixture in all its glory. Notice there is a clamping area and some faces that locate on the top surface of the vise. These features were intentional in order to make setting up the job easy. There’s a pair of bearings, one on each end, that support the bolt and allow it to turn. After hobbing a few of these bolts, I learned to not install a nut on the other side. It will certainly bind the bolt and not allow it to spin freely!
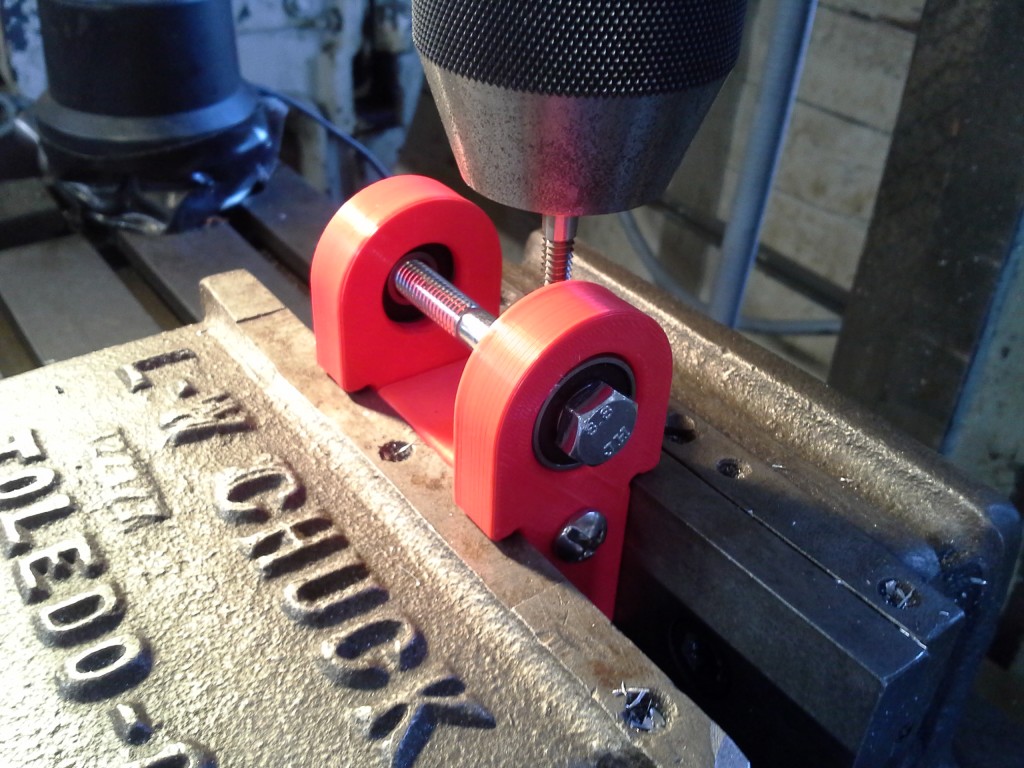
To find out where to hob the bolt, assemble the extruder with the large drive gear and all the associated parts. Then take a Sharpie and make a mark on the bolt where the groove needs to be. Take the bolt out, install it in the fixture and line the tap up with the mark. This photo shows the tap behind the bolt but it’s easier to move the tap directly above the bolt and line up the point of the tap with the Sharpie mark.
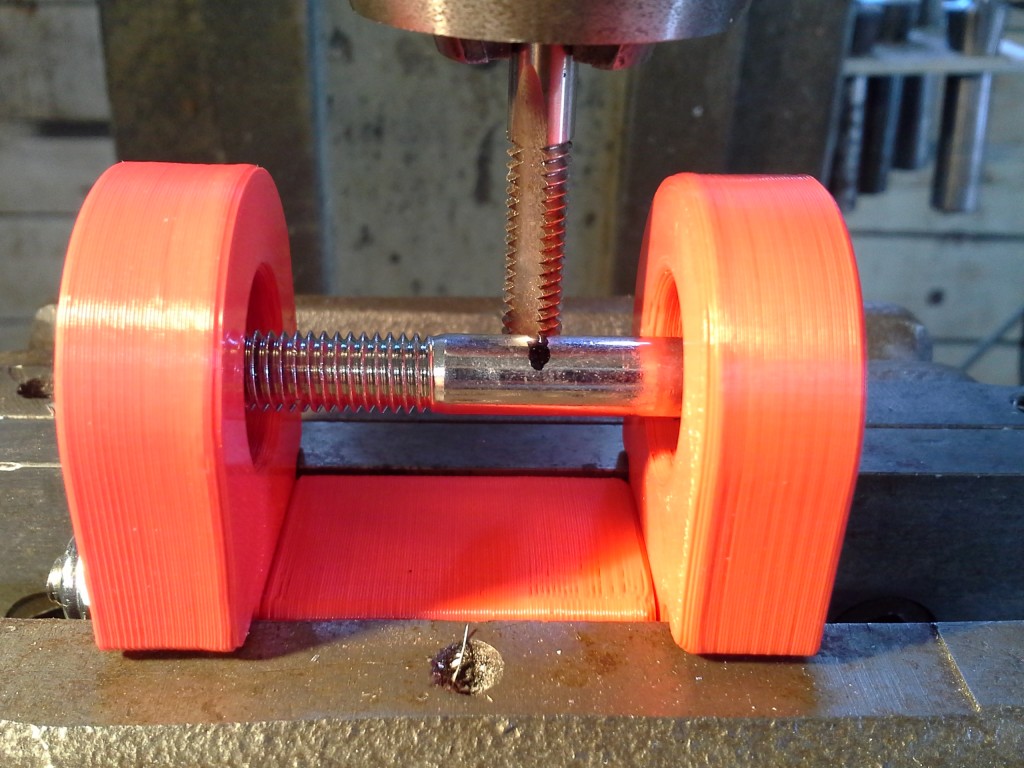
In this photo, the bolt head is on the right and there is no nut on the left side of the bolt. This is important because the side of the tap that is nearest to the camera moves towards the left. Once the milling machine is turned on, the tap will spin and will be fed slowly into the bolt from behind. So, the lateral (axial to the bolt) force pushes the bolt left and keeps the bolt head pressed up against the bearing. If the bolt head was on the left, the spinning tap would push the bolt out of the fixture.
As the tap cuts grooves in the bolt, the bolt rotates due to the threads on the tap. This works out great for the hobbyist hobber… just keep feeding the tap into the bolt and watch the grooves appear. I found a 1/4-20 tap works great. I usually eye-ball how deep I go but for this particular bolt I paid attention, going in 0.030 inches (radially).
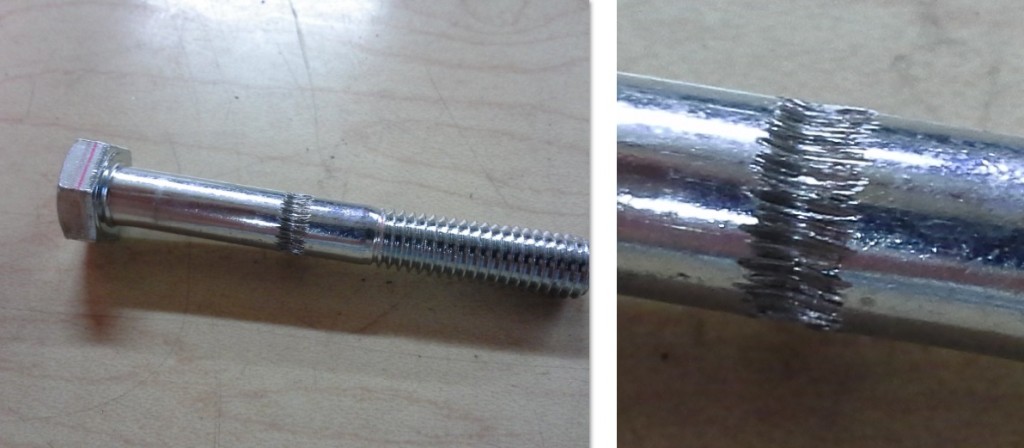
Here’s the hobbed bolt. Everything looks good.
…and installed in the extruder…

…not too bad. There will be another post when this puppy is up and running.