 I’ll be the first to admit my phone is old, very old, but it is small and fits in my pocket nicely. Majority of new phones seem to be near-tablet size. I did want an upgrade and I thought wireless charging would be the way to go… here’s my disappointing story:
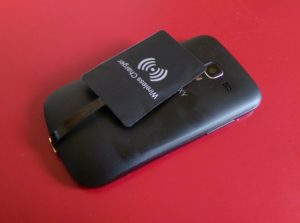
You’ve most certainly seen those Qi Wireless Charger Receivers that plug into the micro-USB port on a phone and make your phone have wireless charging capability, right? They are only a few bucks on eBay. I bought one knowing it wasn’t what I wanted because it uses the USB port and it required the use of a phone case to keep it from flopping in the breeze. When I received the charger receiver, I also noticed that it would cover up the flash and part of the camera. The charger receiver was too long:
UPDATE: Don’t forget part 2: update here
The good thing is that I wasn’t planning on using the receiver as-is anyways. My goal was to cram it inside inside the phone with no change to the phones appearance, totally non-obtrusive. This would also allow me to use the USB port for removing photos or charging if a Qi charger wasn’t available.

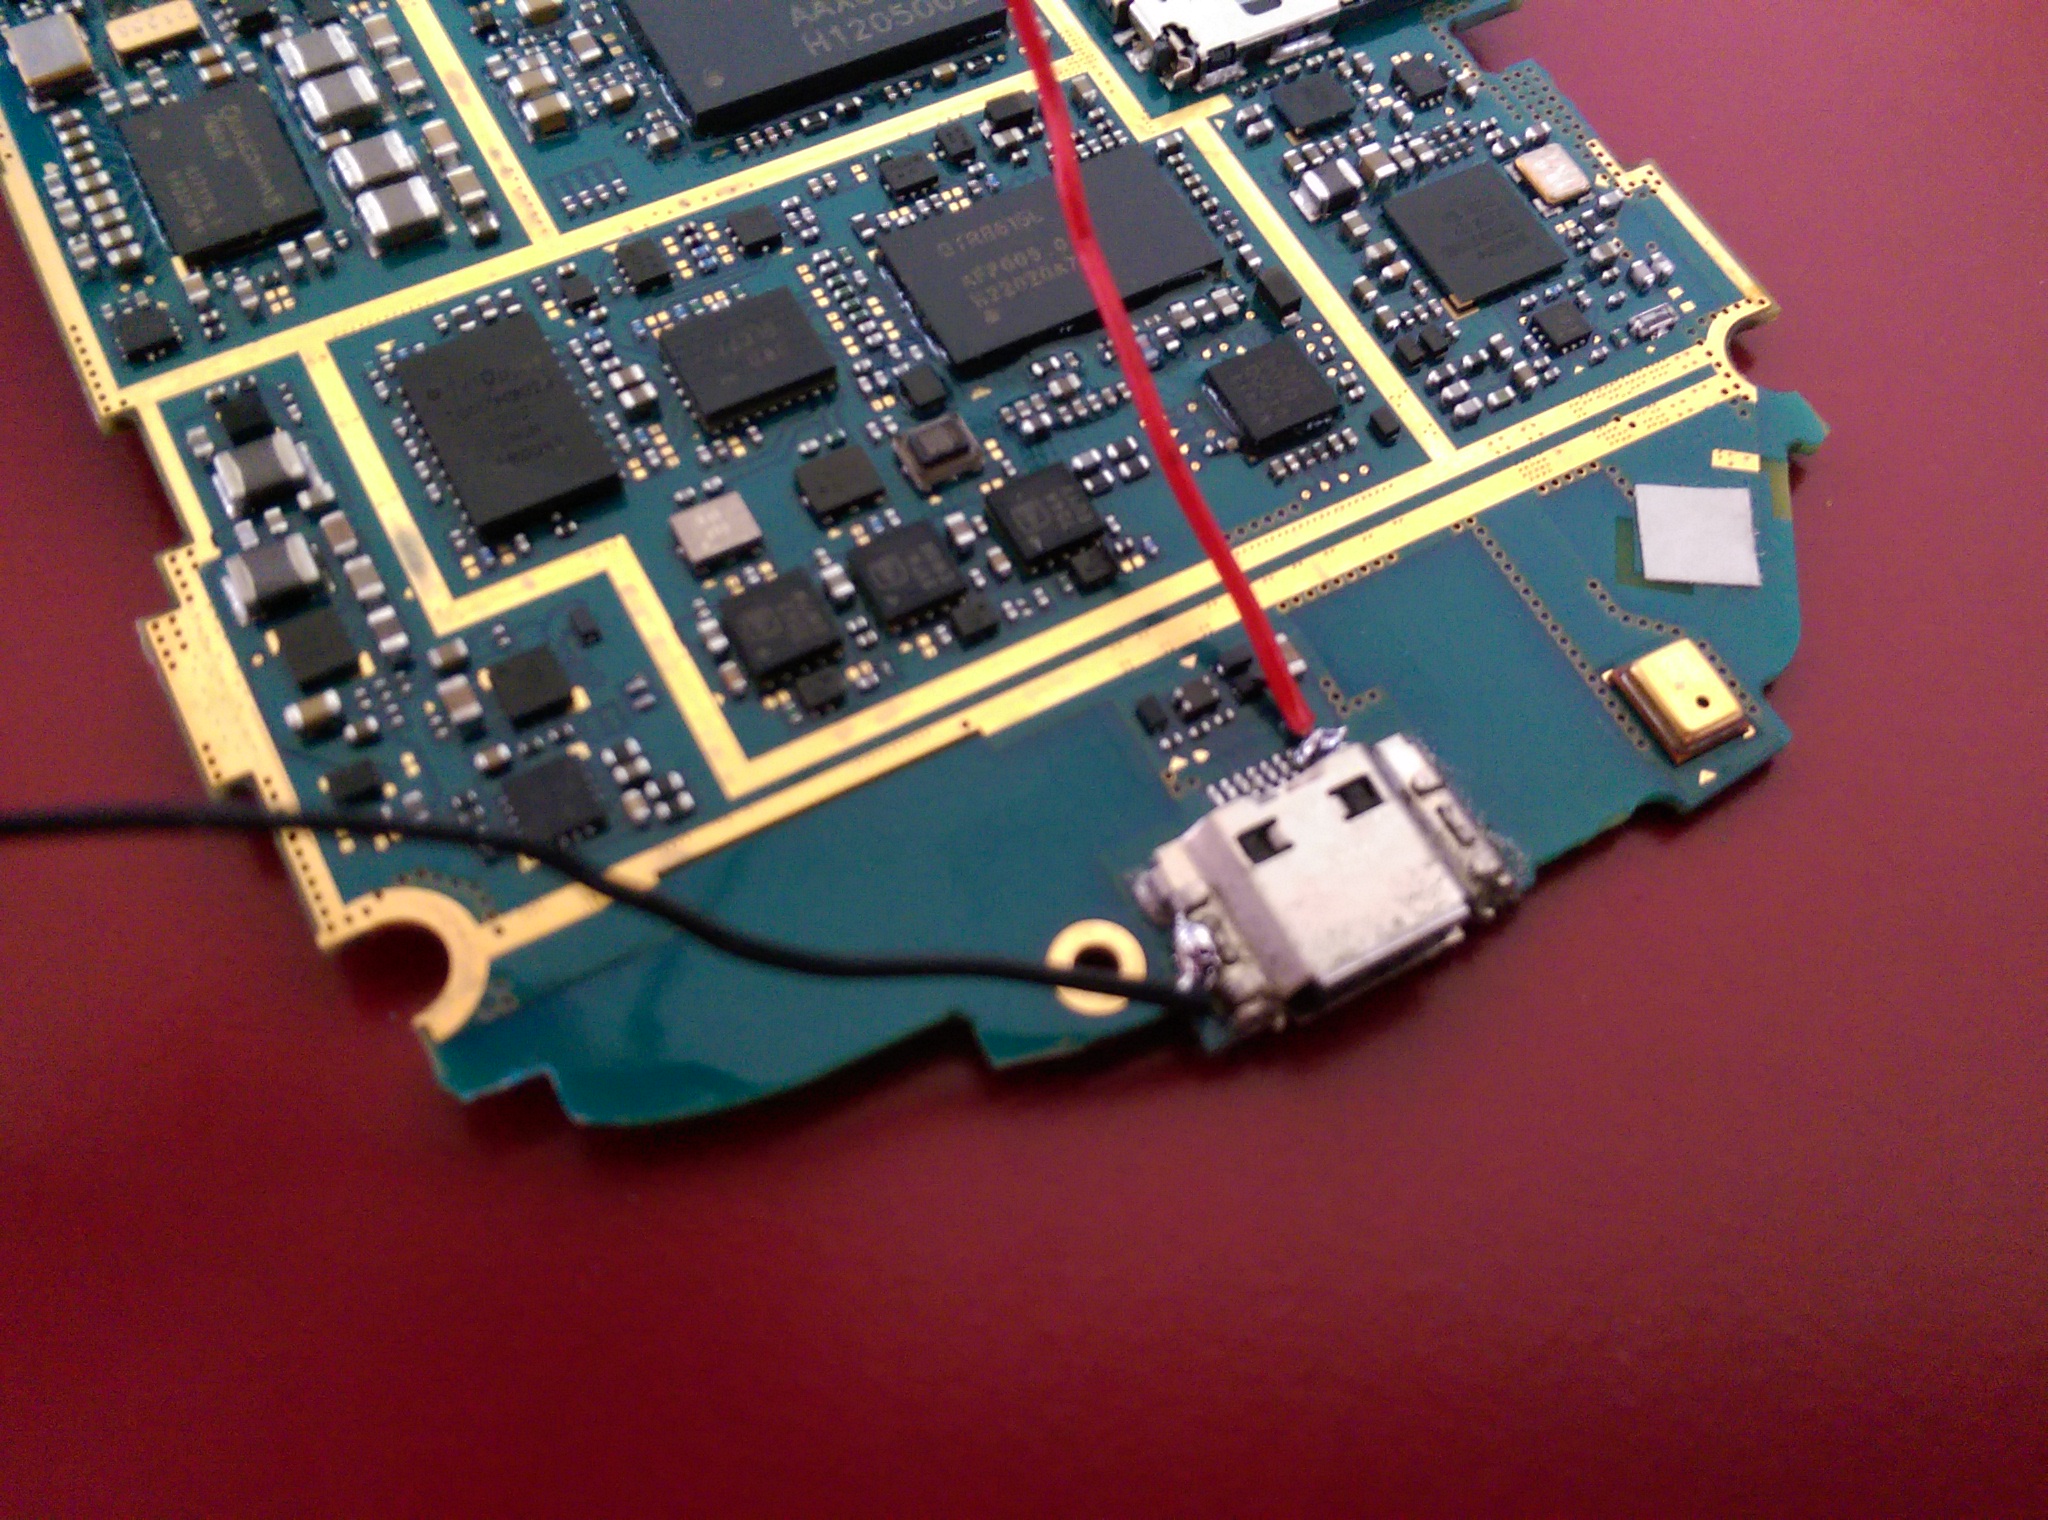
In the above blurry photos you can see the micro-USB port on the phone PCB. This phone, a Samsung Galaxy Exhilarte SGH-i577, is a very easy phone to disassemble. No glue or anything, just plastic snaps and some screws. After checking out the USB pinout online and carefully planning wire routing, I soldered some small wires to the +5 pin and grounded casing. Check out Bill’s small mobile solder station, I have a similar setup and it is the best for quick solder jobs!
Wire routing was a pain. There isn’t much room in the phone. I did have to grind away some of the plastic case and even make a couple notches in the PCB board. Here’s a photo testing the wire path. The photo makes it look like I just slipped it in there, that is not true. There was a lot of planning and grinding to get that wire to fit!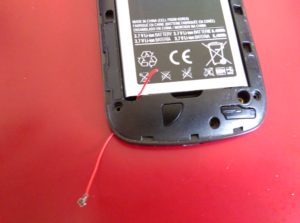
Lucky for me, it was easy to access the PCB board inside the charger receiver. There was an adhesive plastic cover that just peeled off. I was able to remove the long lead with the USB connector on it and solder my new wires on. Notice that there are two pads labeled +5v. Oddly, there is no continuity between them. I don’t understand it but that is the reason my wires are crossed. It would have been nice to use the other +5v pad to avoid crossing wires. I replaced the adhesive plastic cover before re-assembling the phone.
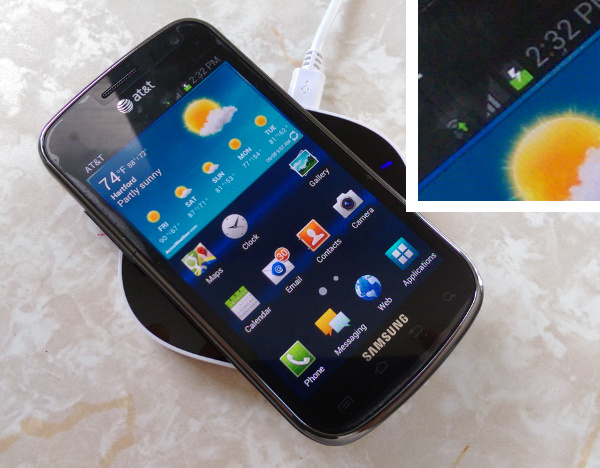
The stock back cover fit, although a little tight. Below is a photo of the phone charging on the charging pad. If I stopped the story right here, it would be one of excellent success, but unfortunately, there’s more. I noticed how charged the battery was before starting to charge via the new wireless receiver. I wanted to see how long charging half the battery took with the typically-slower wireless charging. Well, after only a 5% increase in battery charge, the phone gave a warning something like: “charging stopped, battery temperature too high”. I picked up the phone and yes, it was hot, dang hot.
For now, I’m not sure how to proceed. I may just surrender to plug in my phone for the rest of my (or it’s!) life.
UPDATE: This turned out to be not so bad… update here